Below FAQ are some common concerns of our clients before purchasing.
If you have other questions, please just send it to support@mubview.com.
- All
- Pre Sale Questions
- Add Camera
- Internet
- Motion Detection
- Notifications
- Battery Problem
- Share Camera
- Cloud Service
- Micro SD Card
- Account
- APP Features Experience
- Others
Need Help?
If you have an issue or question that requires immediate assistance, you can contact us via support@mubview.com.
We will get back to you within 48 hours!
Pre Sale Questions
It will ship in 2-3 days and arrive in 2-3 days except for remote areas
If there is any problem with our camera, you can contact us freely via support@mubview.com and we will try our best to help you.
Yes, if there is any problem with our cameras, you can contact us and we will offer refund and exchange.
If you don't want to subscribe to the Cloud Service, you can use the Micro SD card to store the recording.
Yes. We frequently have many discounts and you can follow us on our website and social media to keep up with our new arrivals and discounts.
Yes, we do. Please send your customisation requests to support@mubview.com, we will give you our quote. Thank you.
Our cameras can support Mobile Phone and Tablet operation, you can download MUBVIEW or CloudEdge apps in app store or Google Play.
Add Camera
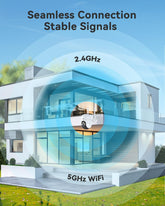
Please remove the plastic protective film on camera lens first. Please check whether you have reset the camera successfully. Long press the "reset" button until you hear the "boo gu" prompt. The WI-FI signal should be greater than 80%. And ensure you have input the correct WI-FI name and password. Kindly note that our device only supports 2.4Ghz WIFI connection. Scan the QR code on your mobile phone please try different angles and distances.
If you still fail to set up the camera. Please try another APP to connect. Our camera supports CloudEdge and Mubview two APPs. Please try to reset the WiFi router.
1.The WI-FI password is wrong.
2.Make sure you are using a 2.4GHz network used or the router is too far away, and the router settings are wrong.
After selecting the type of camera, please directly click on the image on the right to proceed with the next steps
Internet
The reason why the camera is offline may be that the network signal connected to the camera is weak, the installation location of the camera is too far from the router, or the camera itself is weak in receiving network signals.
Check whether there are other devices near the camera that affect the camera's connection to WiFi.
You can try to restart the router, reset the camera, and try connecting a camera near the router to see if the same situation still occurs.
Or after resetting the camera, connect to the hotspot of another mobile phone(2.4GHz), connect to the hotspot for a period of time, and check whether the offline situation still occurs.
If you're having trouble accessing the live stream from your device, it's likely due to issues with your internet connection. You can try various troubleshooting steps, such as checking your internet connection, moving the device closer to the router, restarting the router, using a Wi-Fi range extender, reducing network congestion, checking your internet speed, try refreshing or Uninstall and reinstall the APP, and adjusting network security settings.
If you're having trouble accessing the live stream from your device, it's likely due to issues with your internet connection. You can try various troubleshooting steps, such as checking your internet connection, moving the device closer to the router, restarting the router, using a Wi-Fi range extender, reducing network congestion, checking your internet speed, try refreshing or Uninstall and reinstall the APP, and adjusting network security settings.
2. Please check whether the mobile phone network is normal.
Motion Detection
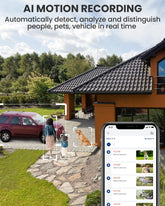
a. To enable the motion detection feature, please tap the camera "setting" icon > tap "Alarm Management" > tap "Motion Detection" > enable "Motion Detection".
b. The camera sensitivity can be set, with three gears of low, medium and high
c. You can set the recording time of the wireless camera by tap "Custom Mode", there are 10 seconds, 20 seconds, 30 seconds (wired camera has option of 1 minute, 2 minute, 3 minute ). If you don't want to receive too many notifications from the camera, then you can turn on only human motion detection.
This is how motion detection works: when the PIR sensor perceives a change in the environment, motion detection will be triggered. The change in the environment can be a moving object, light change, the alternation of hot and cold air, etc.
Particularly common false triggers include trees shaking after being blown by the wind, the cold air of the air conditioning, etc.
If you have this issue, here are tips for you to adjust.
1. Change the position of the camera to avoid false triggers like trees or plants triggers.
2. Set "Detection Sensitivity" to "Low" or "Medium". After doing that, the distance the PIR sensor can perceive will become shorter so that false triggers may be reduced.
Some users may feel it annoying that when the camera starts recording the person in the camera's field of view has already gone. Or obviously and for sure, there is a movement in the camera's field of view but the movement is not recorded. If you encounter the issue, here are tips for you.
a. Set "Detection Sensitivity" to "High". After doing that, the distance the PIR sensor can perceive will become longer. When the camera's detection sensitivity is "Low" or "Medium", the camera will be more difficult to be triggered.
b. Ensure that the camera is connected to stable and good Wi-Fi. If your camera's network connection is not in good condition, the cloud recordings may fail to be completed or the cloud recordings may fail to be synced to the "Library" in the app.
c. Please note that when you install the camera about 7 feet high and 10°~15° downwards, the motion detector will perform best. Besides, please note that the motion detector performs best for movements 5 feet to 20 feet (1.5 meters to 6 meters) from the camera.
Notifications
Alert message notifications are delayed, It is usually caused by the poor network status.
What is the signal value displayed on your APP now?
The recommendation is to keep it at 80-90%.
You can try to connect the camera close to the router to see if the delay problem still occurs.
Please make sure that the mobile phone is connected to a good network signal.
You can try to connect the camera and mobile phone to the hotspot of another mobile phone for a period of time to see if there will be a delay.
The Mubview/CloudEdge app is not granted "Notifications" permission. When the "Notifications" permission is not allowed, your phone isn't able to receive any notifications from the app. Please open the Settings app on your phone > search for "Mubview/CloudEdge" > tap "Notifications" and enable it.
The "Motion Detection" feature is not enabled. When "Motion Detection" is disabled, the camera isn't able to be triggered by any movements, let alone notifications. Please open the Mubview/CloudEdge app > tap the camera "setting" icon > tap "Motion Detection" > enable "Motion Detection".
The "Notification" feature is not enabled. When "Notification" is disabled, the camera is only able to record videos of the movements but isn't able to send notifications to your phone. Please open the Mubview/CloudEdge app > tap the camera "setting" icon > tap "Notification Setting" > enable "Notification".
The camera's Wi-Fi connection or your phone's network connection is poor or unstable. Please check and ensure that both your camera's Wi-Fi connection and your phone's network connection are good for receiving notifications.
1. Change the position of the camera to avoid false triggers.
2. Set motion detection sensitivity to "Low" or "Medium". After doing that, the distance the PIR sensor can detect will become shorter so that false triggers may be reduced.
3. Use the 'Alarm Plan' function. Enter camera settings - "Alarm Management" - "Alert Plan" - Add Time Period. Do not receive notifications during the time period you have set.
Battery Problem
The following factors may cause charge failure. Please check one by one.
1. The charger is not supported or is defective. Please note that the camera only supports a charger with 5V output voltage.
2. The Micro USB charging cable is defective. Please check whether the charging cable is defective, you can use the charging cable to charge other devices, for example, your phone. If the phone cannot be charged, either, you may need to change a charging cable.
3. Please check whether the power adapter and charging cable are faulty, and check whether the wireless camera charging interface is abnormal.
1. It is recommended not to install the wireless camera on the roadside or in crowded scenes.
2. Set motion detection sensitivity to "Low" or "Medium".
3. An alarm plan can be set to reasonably plan the wireless camera's alarm and working time period.
4. Change Power Saving Mode, set the maximum shooting time of the wireless camera to 10 seconds.
5. If the wireless camera's Wi-Fi connection is poor or unstable, it will keep actively searching for the network thus the battery will drain fast.
Please try to place your wireless camera as close to the Wi-Fi router as possible. Thick walls, bricks, ceramics, electromagnetic devices, a large amount of liquid, and large metal objects may interfere with Wi-Fi signals. Please try to avoid these objects. If it still does not work, you may need to use a better Wi-Fi router or a Wi-Fi extender.
1. The charging performance of the Solar Panel depends on the local weather. Please make sure the Solar Panel can receive direct sunlight for several hours a day.
2. Please make sure the USB connector is fully plugged into the camera. Please note that there will be no gap if they connect properly, and their surface is flat.
To charge the wireless camera, a USB charging cable (included in the box) and a charger are needed. Please note that the wireless camera only supports a charger with 5V output voltage. A DC 5V/1.5A charger is recommended. The wireless camera indicates a red light for charging and a bule light for a full charge.
View the remaining power of the camera on the APP
Share Camera
Device sharing operation process:
Click the share button on the home page→Choose a camera to share→The sharer uses the APP to scan the QR code of the sharer→The sharer clicks to accept and the share is successful.
The shared users are not allowed to manage the settings of the camera, such as enabling or disabling Motion Detection & Notification, changing Light Setting & Audio Setting, or deleting cloud recordings.

For privacy protection and account security, one account can only be allowed to log in on one phone at the same time. If the same account is logged in on the second device, it will be forced to log out on the first device.
However, if you want to access your camera on two or multiple devices, you can achieve it by sharing the camera.
Notes:
Only the main account with cameras set up has the right to share his/her camera with other devices or people.
Please make sure the shared user has been registered and logged in to the App first.
Please make sure the shared user is in the same login environment/country as your main account (owner).
Cloud Service
You can investigate the reasons from the following two aspects:
a. You should purchase event records instead of all-day records. You need to slide to the bottom of the cloud service purchase, select all-day records, and then purchase. Please see the picture. You can go to paypal to apply for a refund and then purchase again.
b. Generally, after purchasing the all-day cloud service, it will automatically record for 24/7 hours. If the cloud service has not yet taken effect after purchasing, the reason may be that the camera's 7-day trial period has not yet ended. After the 7-day cloud service trial period ends, it will automatically record for 24 hours.
Sorry, after purchasing the cloud service package, you cannot switch to other packages or merge packages.You can go to paypal to apply for a refund and then purchase again.
Cloud storage supports one account per camera, It is recommend to try it for 7 days for free to see if the function is useful to you. After 7 days, you decide whether to buy it. If you don’t want to pay for it, you can choose to use an sd card, it is recommended to use a Class 10 SD card with a capacity of 2-128GB.
For android users, to cancel the automatic renewal, please manually turn off the automatic renewal in Google Play Store settings at least 24 hours before the expiration time of your subscription. You can cancel it in Play Store payments, Mine - Subscription, find our App, and close.
Please note that if you cancel within 24 hours before your service expires, you will still be charged for the next subscription period. The subscription service will end at the end of the next subscription period.
After creating an Activity Zone, the app will send a notification to your phone only when a movement is detected within the Activity Zone. It is important to point out that all movements that occur in the camera's field of view will be recorded, regardless of whether they are detected within the zone or not. So you can see that the Activity Zone feature only affects notifications.
Micro SD Card
Please format the SD card first. Sometimes after inserting a Micro SD card, the camera will report “Please use the app to format your SD card first”, that's because your Micro SD card is not the FAT32 format that the camera supports.
In this case, please tap the camera Setting > tap Recording management > tap Format to format it first. If it fails, please use a computer to format it into FAT32.
If the Micro SD card is detected, you will hear "SD card detected" at the time when it is inserted, and you can see both the storage of the Micro SD card and "SD Card Video" in the app.
A. SD needs to be Micro SD, at least 10MB/S to transfer.
B. The camera supports up to 128G Micro SD card. (We recommend a 32G or 64G micro SD card for the camera)
C. The camera needs to insert the Micro SD card when the camera is turned off, otherwise the camera cannot detect the SD card.
If you want to know the specific brands of SD cards, I might recommend cards from well-known companies with years of business and quality products, such as SanDisk, Kingston, Samsung, etc.
Account
1.Search for "CloudEdge" or "Mubview" on the App Store or Google Play and registration
2. Scan the APP QR code on the manual for download and registration
It may be an adaptation problem. First check whether the big font is set. If so, set it back first.
If this is not the problem, please provide the mobile phone model and Android version and app register screenshot.we will check it.
APP Features Experience
Or you can uninstall the app and reinstall it to make sure the microphone function is allowed.
Here are two possible reasons:
1. The problem with the mobile phone, the sound from the mobile phone is not picked up: it is recommended to check that the mobile phone does not have permission to the APP microphone; replace the mobile phone for a comparison test.
2. The problem of the camera: the speaker of the camera has no sound; it is recommended to confirm whether the speaker of the camera can work normally, such as whether the camera can make a sound when the camera is switched on or off or the alarm is turned on.
When the camera detects that someone is trying to take the camera off when it is turned on, the anti-tamper alarm will sound.
Find the tamper alarm on/off in the live page of the camera or you can find the tamper alarm on/off in the motion detection.
Others
2) Delete paired device
3) Press and hold the setting button above the Chime for 5 seconds to reset, and press the setting button again.
4) Chime will flash red and it is in pairing mode.
5) Click the "Chime Pairing" button in the App----press the doorbell, Chime will be solid blue, that is, the pairing is successful
After the camera is connected to the charging cable, check whether the indicator light next to the charging port is on. You can record a video of this operation and send it to our customer service.
Or you can check the serial number on the camera body. A serial number is a string that starts with 06 or 10.

